For the last few years, my daughter and I have made boardgames together. It’s become something of a tradition, and along the way I realized it’s an amazing educational tool. So here’s some of what we made, what I learned, and some tips to make your first game.
We started with something she entitled The Great Diamond Quest (in which players have to travel around the board getting gems and magical items, then defeat the dragon in the middle):
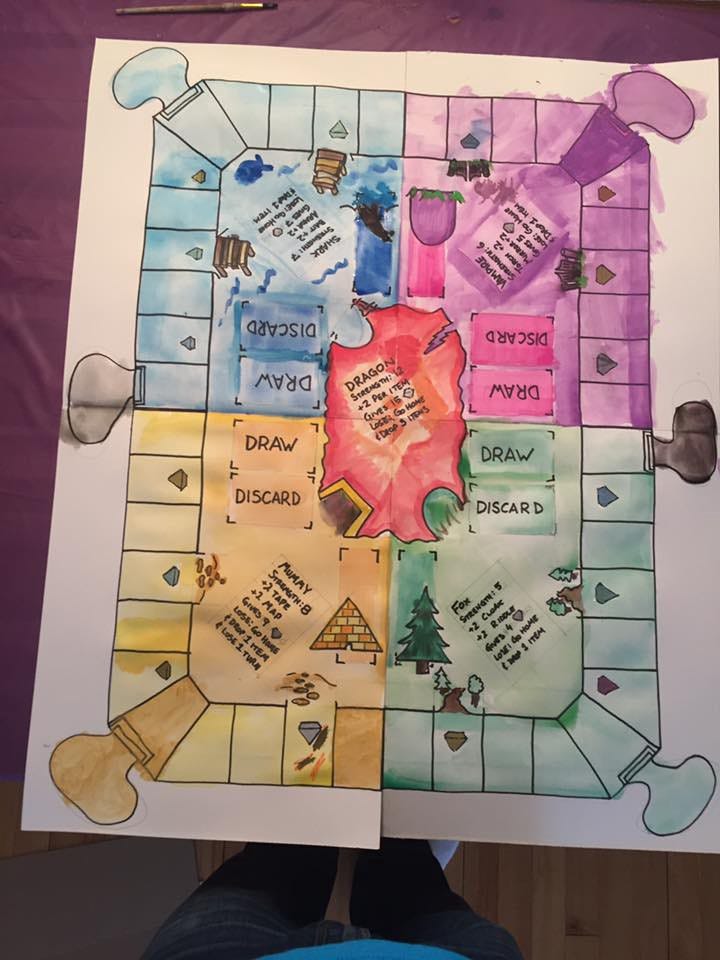
We drew this with sharpie then added watercolors.
Then it was a set-building card game called Family Town Jungle Band:
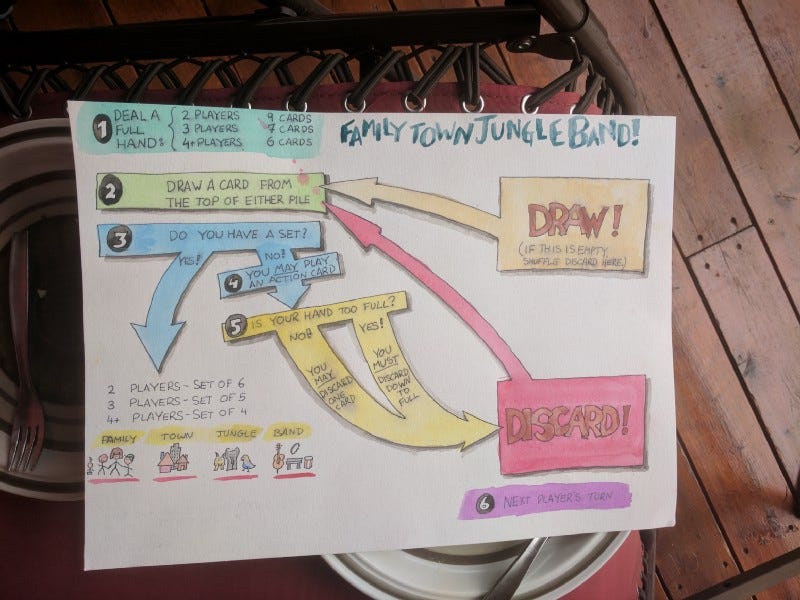
Writing the gameplay sequence down on a mat makes it way easier to learn.
And this summer, we made Harry’s Potion Race (a Potter-inspired game where players use potions to move around a board — and sometimes the potions backfire in hilarious ways):

My daughter wanted the first part of the board to be “like a maze.”
We’ve talked about making video games. One, based on a game we play at the park in which we jump from rock to rock and the water is full of sharks, even got to the storyboard stage:
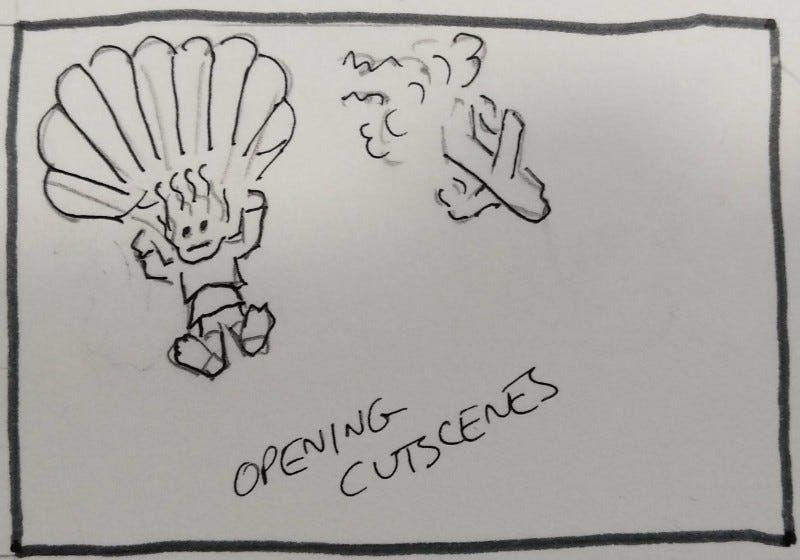
Our heroine, parachuting to an archipelago from a downed aircraft.

The game screen.
We also built a simple Choose-Your-Own-Adventure game using Ink, a scripting language for branching narratives, which only took us a couple of hours to create. Definitely worth checking out (and you can share the results with family!)
But remember: The more complexity between you and the idea the less likely it is you can build a game in a day. So our best work has been with tangible things and tight iteration.
When we begin, we don’t really have a full idea. The Diamond Quest game started with figuring out some monsters to fight; then Riley went and found seven gamepieces (actually the seven dwarves from Snow White) and she suggested we put elastic bands around them, and tuck the “inventory” items (written on little sticks) into these bands. This informed the rest of the design: Roaming the board trying to find materials to defeat the monsters.
Similarly, the Jungle Town Family Band began with a discussion about sets of things (animals in a jungle; buildings in a town; members of a family; instruments in a band) and then turned into a set-building game.
Making games with kids is amazing
Doing this is great fun, and gives you a chance to build something together and then teach others. But beyond the obvious enjoyment of creating as a team, there are a ton of reasons to do this that I wish we’d see more of in school curricula.
It has creativity
Making boardgames is a lot of art. In some cases you’re also illustrating cards. (That’s fun, but it can get complicated quickly, as you’ll see below.) We often make gamepieces out of Sculpy/Fimo, which is perfect for prototyping.
Here’s the witch, one of the characters in the Potion Race game:

This was made with Sculpey and baked for a while.
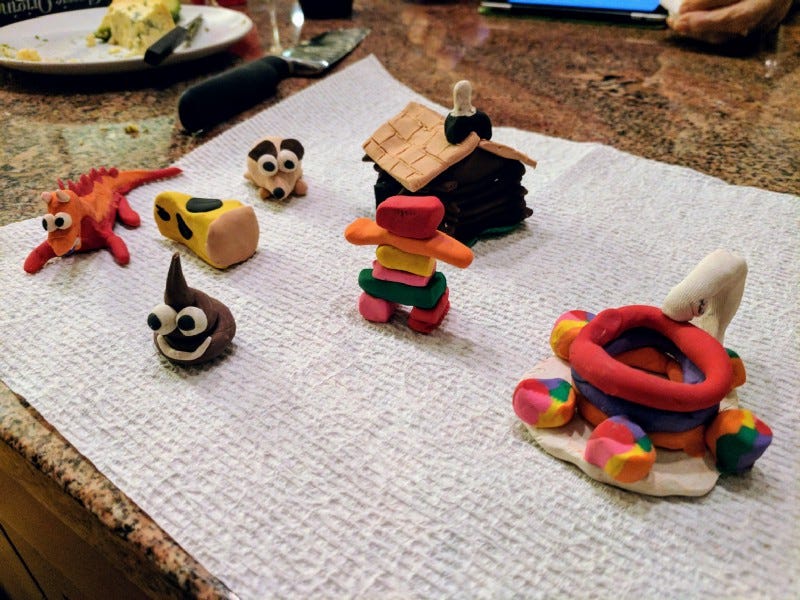
The Crayola air-dry clay works well for prototypes too.
If you’re making many of each thing, be sure they’re simple and clearly distinguishable from one another:

Tokens for the Potion Race: A snail (slows you down); a brain (feeds zombies); a flashlight; a grimoire (better potion success); a hat (keeps you warm against frost giants); a staff; a broom; an invisibility cloak.
You can also use color-neutral Sculpey and paint on it, if your children like painting.
As for the board, draw it with pencil first and try playing. Then use markers, and play again. And finally, paint with watercolors.
It forces questions of balance and fairness
When you’re playing a game, it’s immediately apparent if it’s unfair. If someone always wins, or some rule means things go on interminably, you’ll notice. Rather than fixing it yourself, you can ask, “how would you fix that?” Often, the suggestion for correcting an imbalance is to introduce another band-aid imbalance — and things quickly get too complicated. Then you can return to the underlying system and try to make it fair on a fundamental level.
It teaches theory of mind
When you’re designing a game, you have to think about how others will behave. This is a great way for children to develop a theory of mind—and then try it out. Often, kids assume that everyone will do things the way they do. They believe that if they understand something, it will be obvious to others. (I think that) the sooner they realize this is not the case, the more clearly they’ll communicate and the more readily they’ll develop empathy.
It’s iterative
The first few rounds of play won’t work. That’s OK—talk about why they didn’t. This is a great way to convey ideas like the Minimum Viable Product (MVP) or iteration and improvement.
When we first played Diamond Quest with other kids, we didn’t expect it to last. But they kept playing it, sometimes for an hour and a half at a time. It was unbelievable.
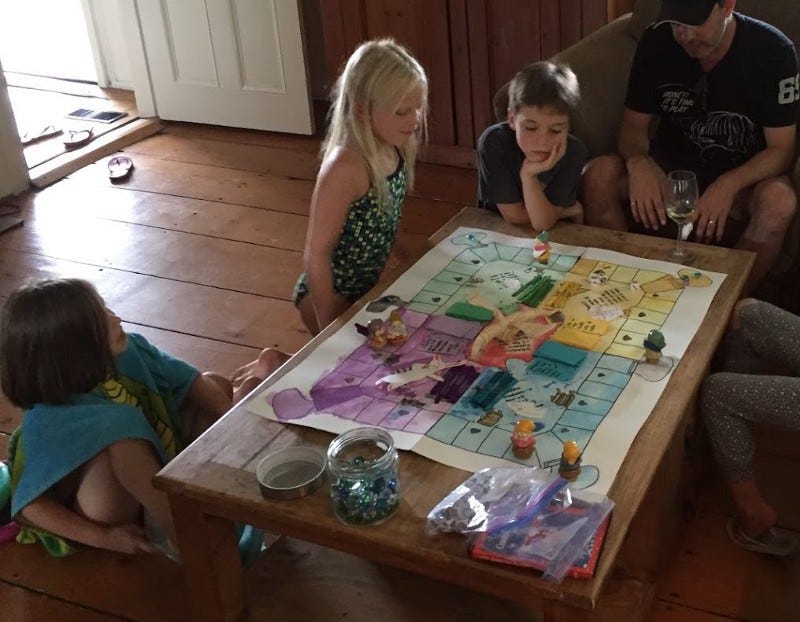
An hour into their second game.
Some tips to get started
If you’re up for making a game with your kids, here’s what I learned.
Get materials ready
Plenty of materials you can write on or use for mechanics is a great way to start. I’ve used:
Popsicle sticks (as tokens, inventory, or a way to randomly choose something by drawing one stick from a bundle.)
Poker chips, either as currency or tokens.
Post-it notes. Great for making corrections on the board.
Colored paper to use for playing cards (index cards work well too.)
Markers, ideally fresh sharpies; plus watercolor paints for the board.
Sculpey or Fimo modeling clay, plus acrylic paints, for game pieces.
Sheets of paper taped together, a big roll of paper, or foamcore you can draw on for the board.
Ziplock bags to put it all in.
Having more materials than you need encourages serendipity. It also provides a quick solution to the inevitable suggestions your kid will make—if they want to add a game mechanic you need to keep track of, such as gaining gold, you can have a track on the board and move tokens along it.
Copy unabashedly
For your first game, use something familiar (like Snakes and Ladders) and just play with the naming and characters. Then add one idea (for example, certain squares make you draw a card that forces you to do something silly, or trade places with another player.) Don’t try to make an entirely new game the first time—the customization will be enough.
Play early, play often
As soon as you can, play a round of the game. Talk about what worked and what didn’t. See which part of the creation your child likes, and double down on that. Rope in others to play and see where they get stuck or what they don’t understand—and have your child try to explain it to them. They’ll quickly realize that being an expert is hard!
Mix game mechanics for randomness and strategy
Most of our games have one simple way to win (“get five or more cards,” or “be the first to get to the middle of the board,” for example.) But we usually have multiple ways to do that:
Dice for movement around a board.
Events when you land on a space, such as fighting a monster or gaining an inventory item.
Some form of battle between players (this can be fun stuff like thumb-wrestling, or game-related like rolling dice for combat.)
Some form of cooperation/sharing (a trading phase, or a way to gift something to another player.
Set-building from cards (getting five of a kind wins; getting the whole armour set gives extra benefits.)
Inventory (cards or items you hold that change gameplay.)
Story cards or dice where players have to tell a story and earn the approval of other players somehow.
Secret tunnels or shortcuts. Everyone likes an advantage.
Have a counter for health, or some other progress-meter element. You can do this on a small card or area on the board where players move tokens up and down as they progress, like a health bar in a video game.
Ways to send the leader back to the start. If you can introduce an element that lets laggards catch up, this is a great way to help less experienced players win.
The key is to have a balance of chance and strategy. Games that are purely random don’t tend to keep kids engaged unless there’s a storytelling element. But games that are purely strategic don’t encourage new players to join in. So there needs to be some way to advance strategically— building up inventory; having cards that give you agency over the gameplay or others; and so on—while still letting a roll of the dice put someone in the lead.
One way we do this is with cards.
A quick note on cards: Making cards can take a lot of time, and it’s something that the adult can do quickly while the child is making art. Cards probably need instructions on them.

These are the cards for the Diamond Quest game.
Coloured cards help a lot, and have become part of our game design (for example, in Family Town Jungle Band, you might get a card that says, “randomly take a red card from another player.”) But they can also get complicated — in the example above, each of the four corners of the game needs its own stack of matching cards.
Here’s a spreadsheet for the second iteration of the Diamond Quest game:

Of course, we haven’t actually finished that one, even though I put all these cards into a mailmerge and made proper printed ones.

Things get complicated quickly when you try to improve them.
The cards for FamilyTownJungleBand are pretty simple, but they took some fast illustration at first—and a lot of keeping track of each “suit” and color to make sure that the game effects were evenly balanced.
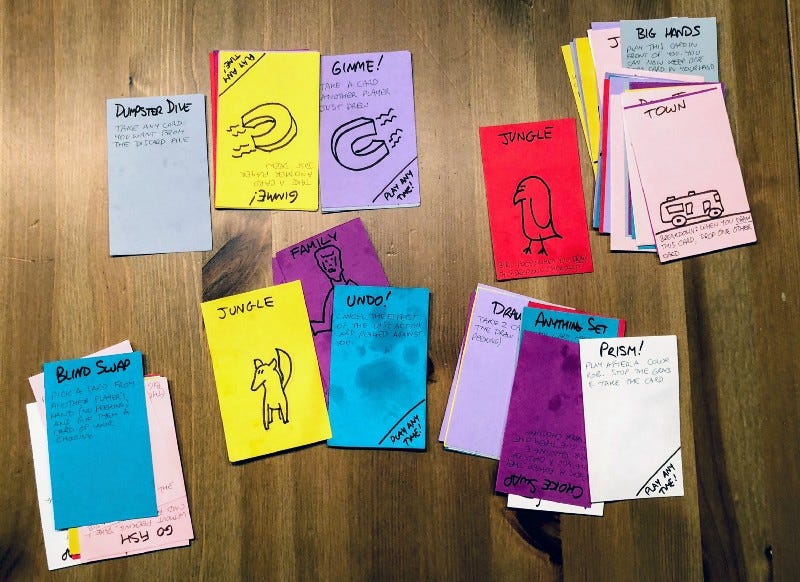
This turned out surprisingly fun. I need to put the cards into something printable and make more decks.
Make it silly
The games all have some random silliness in them. For example, in the Shark area of the Diamond Quest game, you can draw cards that make you do daft things:
Chased by a jellyfish: Swim around the table screaming
Water, water everywhere: Drink a glass of water
Sea shanty: Make up a 30 second song about something in the game and sing it.
Binoculars: Until someone gets a diamond, you must look through your hands as if they were binoculars.
We have similarly themed actions for other areas:
Sloth: Until someone gets a diamond, you can’t use your thumbs. You may want to tape them to your hands.
Bitten by a zombie: For the next minute, all you can say is “brains.”
Mummy’s curse: Wrap head in toilet paper until next turn
Attentive parents will also note this helps keep the players hydrated and physically active as well as engaged.
Enjoy the backstory
If you’re just working out game mechanics, a popsicle stick with writing on it or a token works best.But it’s hard to fall in love with a popsicle stick. Making pieces with a character and a backstory is critical for getting kids interested in this. At XOXOfest this year, I saw a game made by a designer and daughter team, so of course I bought a copy for us to play:

So many moving parts. Fun, tho.
In the game, everyone has a pair of game pieces that are siblings. Riley insisted on painting one of the adorable monkeys silver because, “she doesn’t have a brother or sister so she had to make a robot companion.” It’s that kind of backstory and narrative that makes the game engaging for young minds.
Scribble rules as you design the game
We write the rules in pencil on each gameboard, which means we can adjust and adapt them as we go.
For the card set game, we made a playing surface that lists the order of events in a game—this kind of visual aide makes it easier to pick up a game a year later and play it. You can also see if the rules are getting unwieldy.
In some cases, it makes sense for each player to have a mat on which they collect things like inventory. You can also use this to mark off progress, hit points, armour, or other stateful stuff.
Let it go
The odds are good that you won’t finish the game perfectly. You may want to start on an entirely new one; your kid may lose interest. You have to be okay with that. I’m a bit of a perfectionist around stuff like game mechanics; I have to keep reminding myself that the goal is to have fun and learn, not to produce a polished game you can retail on Kickstarter.
(Though with the third game, Riley started wondering how much we could sell it for, and I had to explain copyright and licensing to her. She insists, however, that if J.K. Rowling would just play her potion game she’d immediately grant us a worldwide license.)


